Deploy OpenWrt Virtual Machine on Proxmox VE
So you want to simulate a network topology just on your personal box, right?
0x01. Select appropriate image
To begin with, we need to download a appropriate image for deployment, and mirror sites are always a better choice compared to the original. Here I choose the stable release for deployment.
0x02. Resize the image
By default, the official image size is relatively small, so it’s recommended to extend the image to a larger size.
# Extract the image.
gzip -d openwrt-23.05.2-x86-64-generic-squashfs-combined.img.gz
# Resize the image.
qemu-img resize -f raw openwrt-23.05.2-x86-64-generic-squashfs-combined.img 1000M
After the resizing process, upload the img file to the Proxmox server using sftp(or by whatever means you prefer), and we’ll use it later on.
0x03. Create the guest
Deploying OpenWrt VMs is different from deploying an Ubuntu guest because there is no ISO file for us to use to install the system. That means we need to import the disk extracted previously to an existing Guest with a valid VMID.
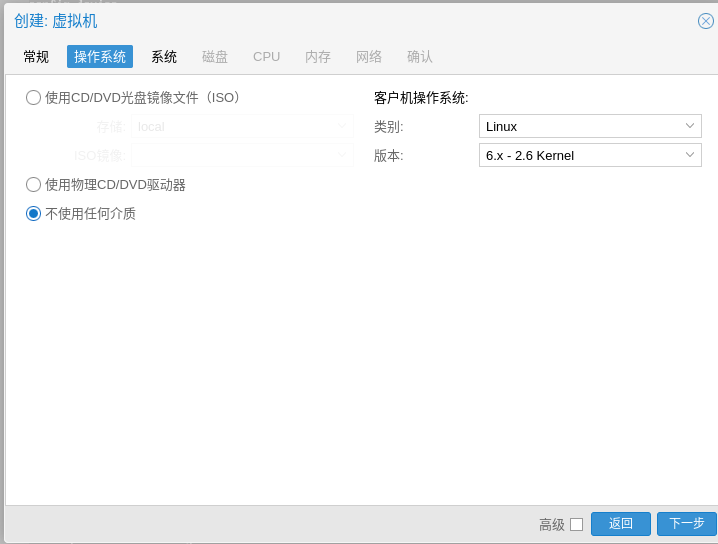
So, for starters, we need to create a virtual machine without any disk attached. This process is exactly the same as creating a virtual machine on Proxmox with a few exceptions: no disk files are generated or included as we intend to import the disk of the system afterwards. Also, there is no need to use CD/DVD files, so it’s okay to just set the option of not using any media.
Configure the rest and delete the disk file.
Now, we need to import the disk to the Guest that we just set up.
# Import the disk
qm disk import 201 ./openwrt-23.05.2-x86-64-generic-squashfs-combined.img local-zfs
Go to the Hardware option on the side-bar and select the Hard Disk(scsi0), choose to edit then hit ok. Now we’ve successfully set up the disk.
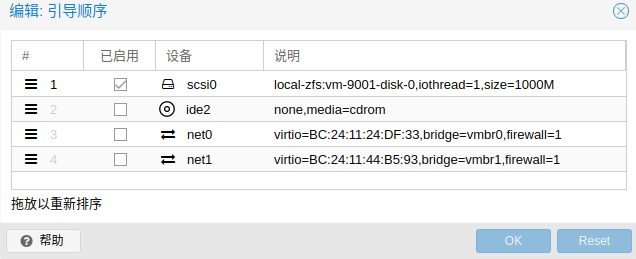
Before booting up the disk, we also need to go to the Options and set the Boot Order to boot scsi0 device first.
With that, it’s time to boot the system.
0x04. Setup the System
Network Configuration
Before booting up the system, I allocated two Linux bridge devices to this VM named vmbr0 and vmbr1 respectively. The vmbr0 bridge acts as a gateway
and connects to the WAN interface of the VM while the vmbr1 bridge acts as an internal switch that connects to the LAN interface of the VM.
This is for the purpose of simulating a situation where local machines connect to the LAN(aka vmbr1), and OpenWrt acts as a fully functional router and redirect
the traffic of local machines to the outside network, so that local machines can get access to the Internet.
By default, OpenWrt sets vmbr0 to LAN and vmbr1 to WAN. To change the default settings, we need to edit the config file at /etc/config/network as follows:
config interface 'loopback'
    option device 'lo'
    option proto 'static'
    option ipaddr '127.0.0.1'
    option netmask '255.0.0.0'

config globals 'globals'
    option ula_prefix 'fd08:8f9d:020a::/48'

config device
    option name 'br-lan'
    option type 'bridge'
    list ports 'eth0'

config interface 'wan'
    option device 'br-lan'
    option proto 'dhcp'
    option netmask '255.255.255.0'
    option ip6assign '60'

config interface 'lan'
    option device 'eth1'
    option proto 'static'
    option ipaddr '192.168.2.1'
    option netmask '255.255.255.0'

config interface 'wan6'
    option device 'eth1'
    option proto 'dhcpv6'
Then restart the network.
# Restart the network to reload the configuration.
service network restart
Configure the luci web interface.
# Start the httpd server.
service uhttpd start
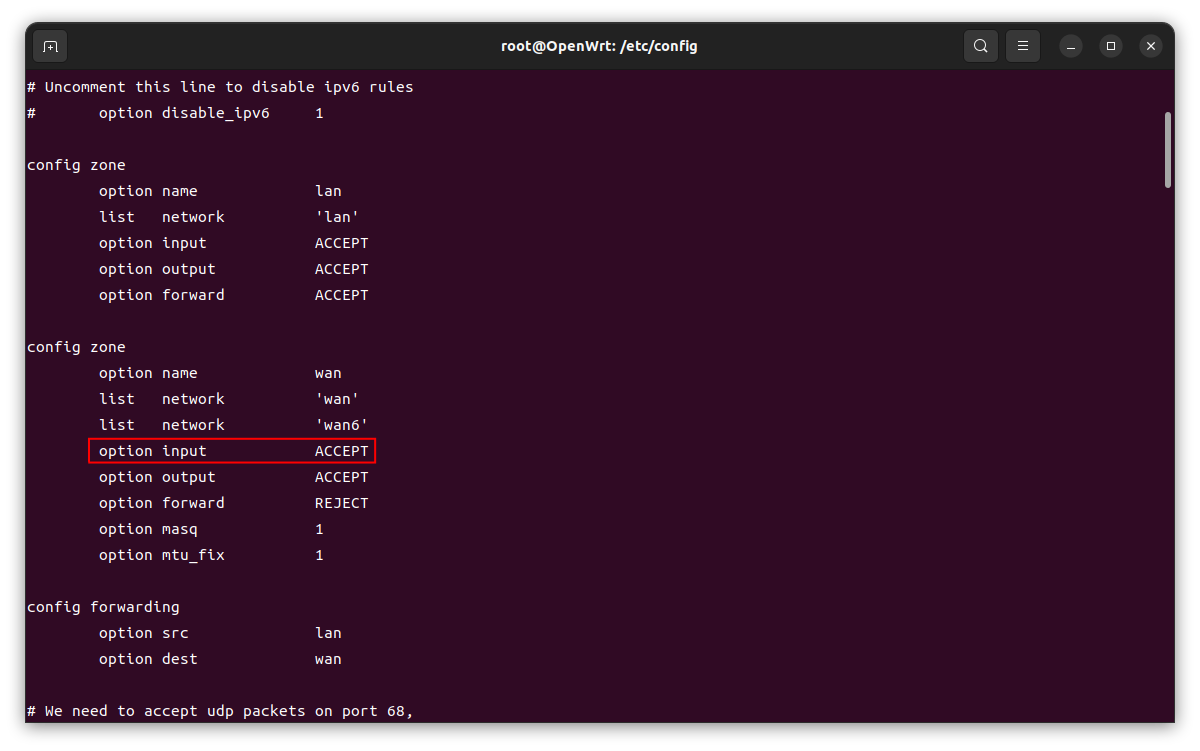
Change the firewall settings in the file /etc/config/firewall to allow host to connect to the machine.
Then restart the firewall daemon.
# Restart the firewall
service firewall restart
Login to the luci interface.

Expand the disk to make a full use of it.
Since we are using squashfs, there’s no need to resize it.